A washer that walks across the laundry room, bangs during spin, or leaves clothes unusually wet can turn a routine load into a real concern. If you searched how to level washing machine, the good news is that many stability problems can be corrected at home with a few careful adjustments. The key is knowing when the feet are the issue and when the shaking points to a larger repair need.
A properly leveled washing machine protects more than your peace and quiet. It reduces vibration, helps the drum spin as designed, and puts less strain on internal suspension parts, hoses, and flooring. Take a few minutes to do the job carefully rather than trying to hold the machine still during a cycle.
Why an unlevel washer shakes and makes noise
Washing machines spin at high speed to remove water from clothing. When one corner of the machine does not sit firmly on the floor, that spinning force is transferred into rocking, vibration, and noise. A machine can also become unlevel after being moved, after a new floor is installed, or as the leveling feet gradually shift under repeated use.
Not every noisy washer is unlevel. An overloaded drum, a single heavy item such as a bath mat, damaged shock absorbers, worn suspension rods, or a failing bearing can cause similar symptoms. Still, leveling is the sensible first check because it is straightforward, costs little, and can prevent further wear.
What you need before you level the washer
Start with the washer empty and turned off. Unplug it from the electrical outlet before pulling it away from the wall. If you need to move it more than a few inches, make sure the water hoses and drain hose are not stretched, pinched, or kinked.
You will usually need a bubble level, an adjustable wrench or pliers, and a towel or piece of cardboard to protect the floor while repositioning the machine. A helper is useful for heavy front-load washers. Do not tilt or lift a washer by its control panel, door, or lid.
If the washer was just delivered or installed, confirm that any shipping bolts have been removed. These bolts are used to secure the drum during transport. Running a machine with shipping bolts still installed can create severe vibration and may damage internal components.
How to level a washing machine step by step
1. Place the washer in its normal position
Set the machine where it will operate, with enough clearance for the water lines and drain hose. Do not level it while it is sitting partly on a rug, loose mat, or folded cardboard. The washer needs a firm, solid surface under all four feet.
Push gently on each upper corner. If the machine rocks from corner to corner, at least one foot is not making solid contact with the floor. Notice which corner lifts or shifts. That gives you a starting point for the adjustment.
2. Check level from side to side and front to back
Place the bubble level across the top of the washer from left to right. Then turn it 90 degrees and check from front to back. The top surface may not be perfectly flat on every model, but it provides a reliable guide when checked in both directions.
A small variation may not cause trouble, particularly on an older home floor. What matters most is that the washer is stable and all four feet are firmly planted. If the bubble is far off center or the cabinet rocks, adjust the feet before running another load.
3. Adjust the leveling feet one small turn at a time
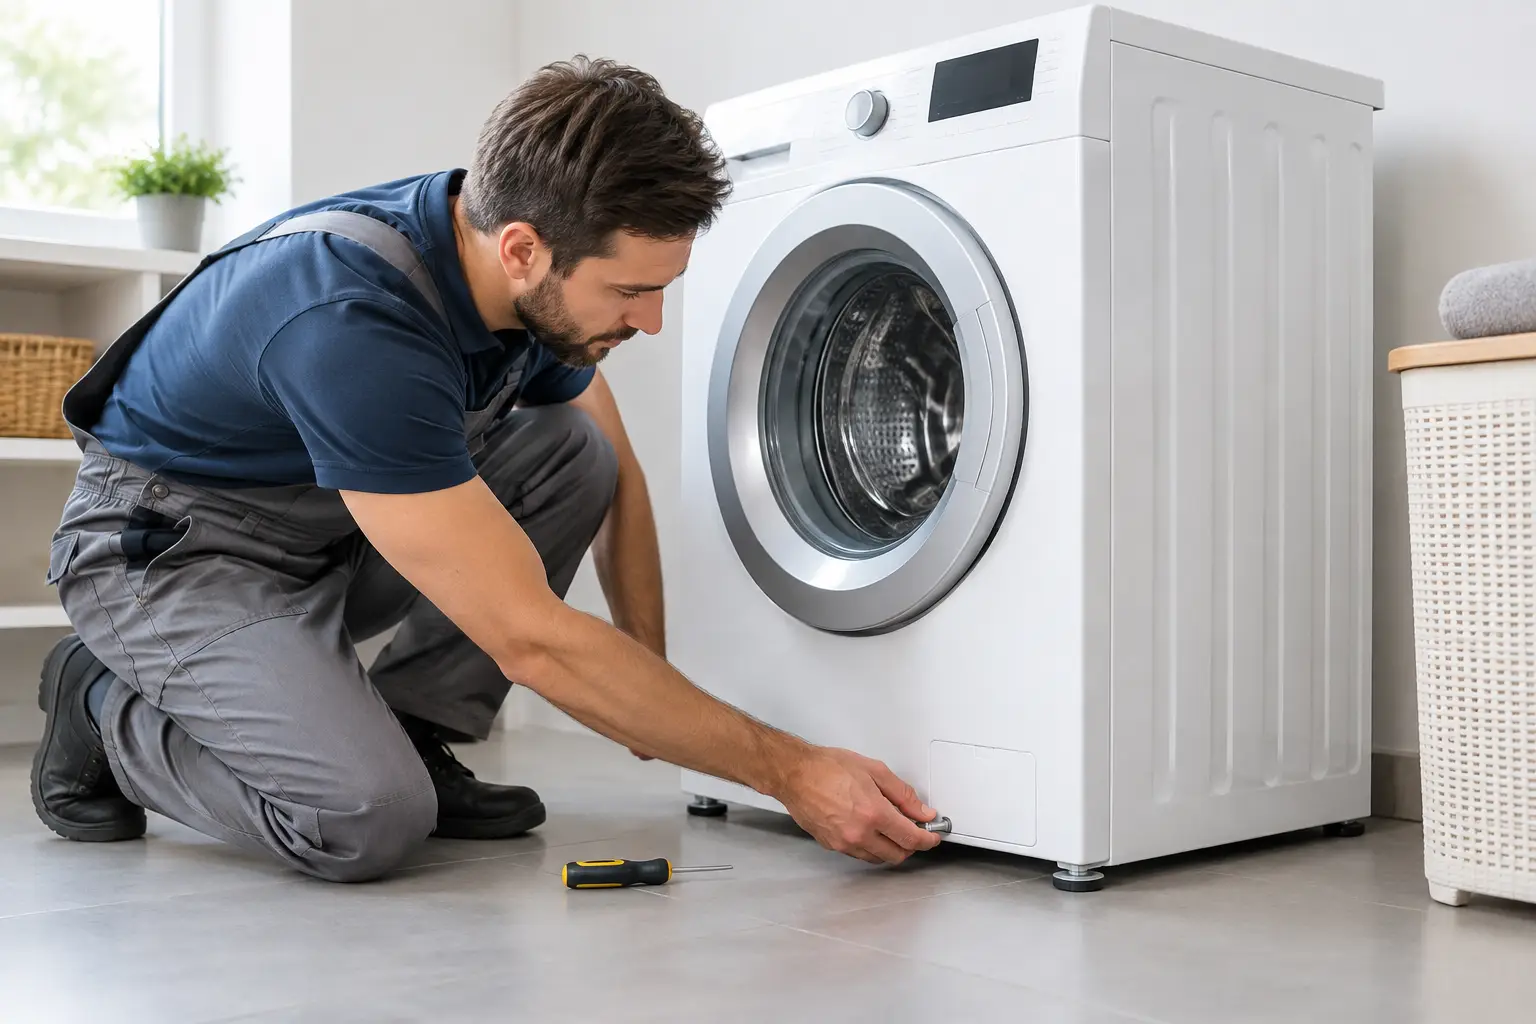
Most washers have threaded leveling feet near the front. Depending on the model, the rear feet may be self-adjusting or may also require manual adjustment. Consult the owner’s manual if the rear of the machine remains unstable after the front feet are set.
To raise a corner, turn the foot outward so it extends lower toward the floor. To lower that corner, turn the foot inward. It often helps to have someone slightly tip the washer back while you turn the foot, but do not place fingers under the machine while it is unsupported.
Work in small increments. A half-turn can make a noticeable difference. After each adjustment, set the washer down gently, check the bubble level again, and press on the corners to see whether it rocks.
4. Tighten the locking nuts
Many leveling feet have a locking nut above the foot. Once the washer is level and stable, tighten that nut against the bottom of the cabinet with a wrench. This step matters. Without it, normal vibration can gradually turn the foot and bring the problem back.
Avoid over-tightening. The goal is to hold the foot in position, not force the nut into the washer frame. Check that each foot has even, firm contact with the floor before moving on.
5. Test the machine with a balanced load
Reconnect power, turn on the water supply if you shut it off, and run a short rinse-and-spin cycle with a small, balanced load. Towels or a few everyday garments work better for a test than one heavy blanket or a single pair of shoes.
Stay nearby for the spin cycle. Some normal vibration is expected, especially on upper-floor laundry areas, but the cabinet should not walk, bang repeatedly, or shift several inches. If it does, stop the cycle and recheck the feet and the floor beneath the washer.
Do not use makeshift shims under the feet
It can be tempting to slide wood scraps, coins, folded cardboard, or furniture pads under a low corner. These quick fixes compress, slip, absorb moisture, or move during high-speed spin. They can make the washer less stable and increase the risk of hose damage or a scratched floor.
If the floor is uneven, use the washer’s adjustable feet first. A properly rated anti-vibration pad may reduce transmitted noise on a hard surface, but it will not correct a machine that is visibly out of level. The washer should be stable before any pad is added.
When leveling will not solve the problem
Call for service if the machine remains unstable after careful leveling, especially if you hear metal-on-metal grinding, loud thumping, scraping, or a repeated banging sound from inside the cabinet. These can indicate worn suspension components, damaged drum supports, a loose counterweight, or a failing bearing.
A washer that suddenly began vibrating after years of normal operation deserves a closer diagnosis. The feet may have shifted, but sudden changes are also common when internal parts wear out. Likewise, a front-load washer that leaks, will not spin, or displays an error code has a problem beyond simple leveling.
Uneven floors can add another complication. Older homes throughout Massachusetts often have floors with gradual slopes or flexing areas. You may be able to make the washer stable with its feet, but a floor that noticeably bounces during spin can still cause excessive vibration. In that case, a qualified appliance technician can confirm whether the washer or the installation is causing the issue.
Keep your washer steady between loads
After leveling, avoid overloading the drum and distribute bulky items as evenly as possible. Wash single heavy items with a few similar towels when the care label allows, rather than letting one soaked item collect on one side of the drum. Check the machine occasionally after moving it, replacing flooring, or noticing new vibration.
A stable washer should do its job without demanding your attention from the next room. If a careful adjustment does not stop the shaking, Fasteny Appliance Repair can diagnose the cause, explain the repair clearly, and help restore reliable operation without unnecessary guesswork.